Digital black-and-white photography tips with Adobe Lightroom
Tips for importing an image into Lightroom
Lightroom isn't always the most intuitive program. If you have problems getting an image to import, try these steps:
• Right-click an image file and select Lightroom as the program to open the file. The image type can be just about any image type, including JPG and CR2, which is Canon's native raw format.
• If the Import button is grayed-out, make sure checkbox for Include in import is checked. If that doesn't make the Import clickable, then make sure the File Handling | Don't Import Suspected Duplicates is unchecked.
• Once you've successfully imported a file, click on the Develop button.
• The developing tools generally are within the right panel of Lightroom, depending on how your Lightroom window is set up. You should be able to scroll up and down that panel to see a histogram and various options for adjusting exposure, contrast, sharpening, etc.
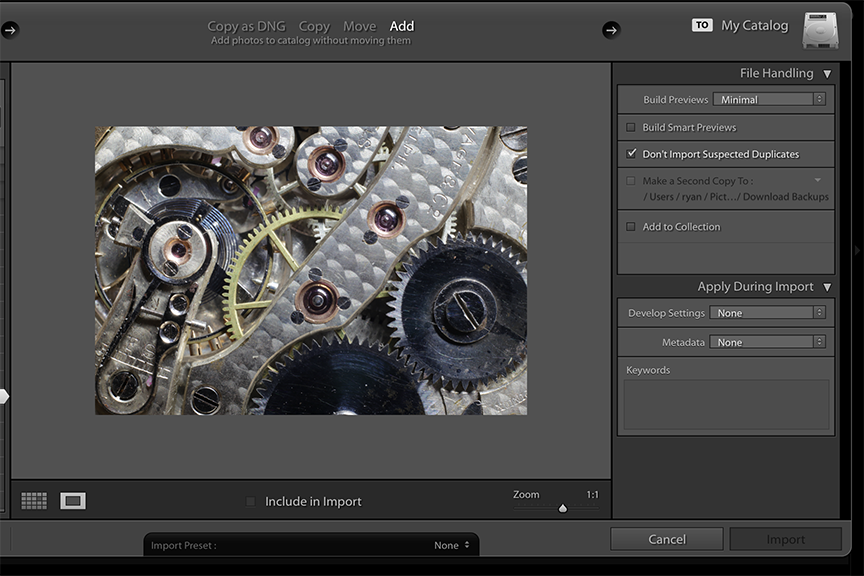
Import button is grayed out, as it is on the bottom right of the photo above, try checking the Include in Import box near the bottom. That should make the Import button active.Get a preview
Within the developing panel, you can toggle between the Treatment: Color and Treatment: Black and White buttons to get a preview of what your color image will look like in black and white, without any enhancements. Mac users can toggle these options with a shortcut of Control + v.
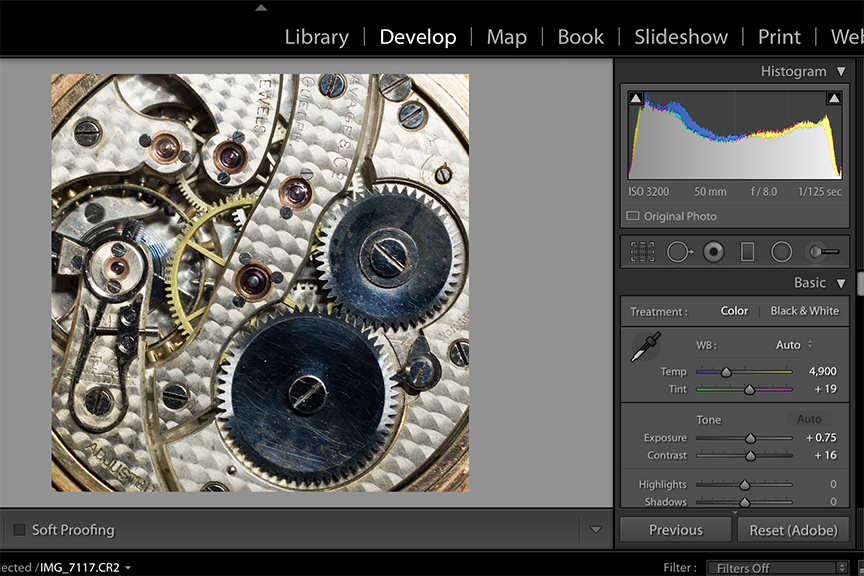
Develop mode. The right panel is scrollable and offers sliders for editing exposure, contrast, sharpness, etc. In the right panel, under the histogram, you can toggle between Color and Black & White to get a preview of what your image will look like in black and white.Get the color right
Before converting your image to black and white, make sure it looks good in color. Try cleaning up the image a bit in Develop mode, playing around with the sliders for exposure, constrast, highlights and shadows, etc. Once the image looks good to you in color, you're ready to convert it to black and white.
Convert it to black and white
There are different ways to convert a photo. One way is to stay in Treatment: Color mode and, under the HSL panel, and lower the Saturation slider for each of the colors.
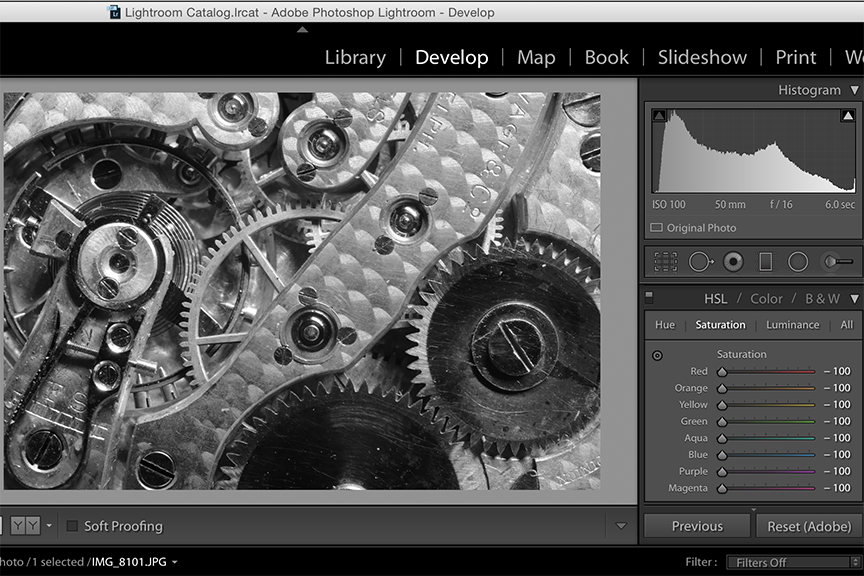
HSL / Color / B & W editing module. Here you can click on Saturation and then move each of the color sliders to -100. Then, you can click on the Luminance tab and experiment with those sliders.After you're done removing the saturation, you can click on the Luminance tab and experiment with the sliders there.
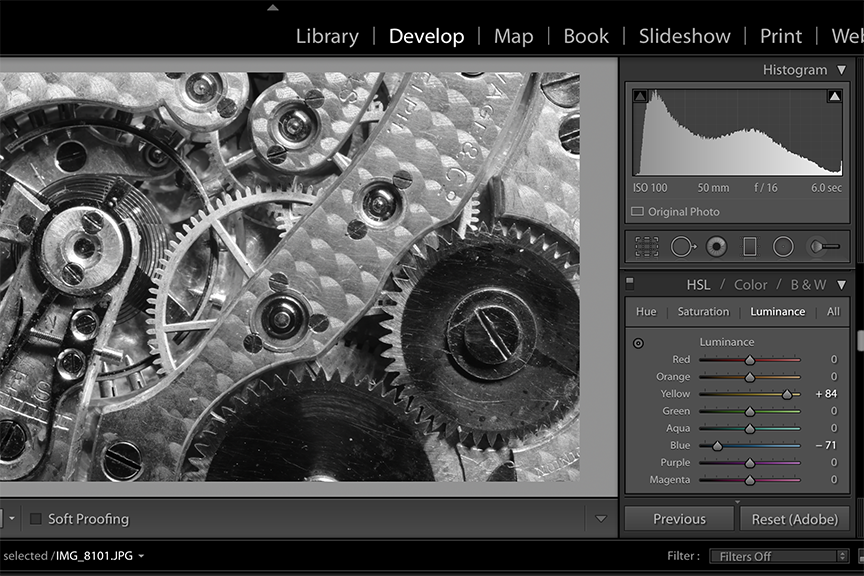
Luminance tab and experiment with those sliders. Although your image appears to be in black and white, Lightroom still has access to the color information and can make adjustments as you move around each of the sliders under Luminance.You also can of course use the other tools in the right panel to adjust contrast, exposure, add some vignetting, etc.
When you have a black-and-white image you're happy with, you'll need to save and export it. File / Export will open the export dialog box.